Defining Criteria
Initiating and Defining Criteria
Auditors develop the criteria questions that will be used as a checklist during their audits. Criteria are controlled documents with approvals and version control.
- From the SmartSolve Portal Page, click the Home tab at the top of the window.
- In the Audit Management section of the list, select Create Criteria.
Result: The Initiate Criteria window is displayed.
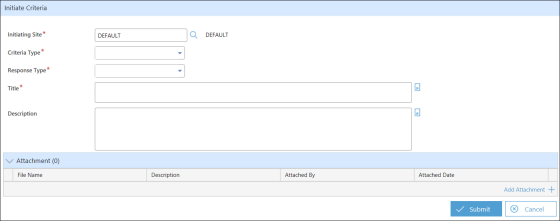
- Zoom to select a site. The site selected defines the criteria team associated with the new Criteria record. This field defaults to the site of the logged in user.
- Click the drop down button and select the type of criteria, such as Supplier or Regulatory.
- Click the drop down button and select the type of response for the criteria, such as PASS/FAIL or YES/No.
- Enter a unique title for the criteria.
- Enter a description of the criteria.
- Add an attachment, if necessary. To add an attachment, click the Add Attachment link and then browse to select files. Then click the OK button.
- Click the Submit button
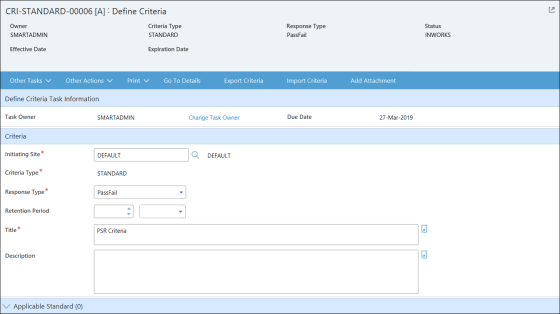
Result: The Define Criteria window is displayed.
 s
s
- Enter the information in the following sections:
| Section | Description |
|---|---|
|
Criteria |
Enter the information in the Criteria section fields. Some of this information in this section will default from the Initiate Criteria window.
|
| Applicable Standard |
Click the Add Applicable Standard link to add applicable standards to the criteria. This section is optional.
NOTE: If you add a row and then decide not to add the applicable standard, you must delete the row. Enter the information in the following Applicable Standard section fields:
|
| Section |
Enter the information in the Section fields. Click the Add Section link to add additional sections to the criteria.
|
|
Question |
Expand the Section section and then click the Add Question link to add a question to the section.
|
| Document |
Click the Add Document link to add a document to the criteria. This section is optional.
Enter the information in the following Document section fields:
|
| Certified Auditor |
Click the Add Certified Auditor link to add a certified auditor to the criteria. This section is optional.
Enter the information in the following Certified Auditor section fields: |
|
Policy |
Policies control the optional steps that can be performed in your Criteria workflow. An administrator can set these controls and restrict your Audit Coordinator and Lead Auditor from selecting or changing these options.
Review the Policy section options:
NOTE: If both policies are set to No, then when the criteria is submitted, the status of the criteria will be Prereleased. The criteria must then be made Current before it can be used in the system. |
|
Team |
Several different user roles are involved in the criteria management process. Customers must configure their own roles to be used with the system. The criteria team members default based on the site selected.
The following tasks (roles) have been configured as defaults in the Audit Management application:
NOTE: If the role is defined as not required in Group Setup, then the Role and Task fields are editable. |
|
Attachment |
If necessary, click the Add Attachment link and then browse to select files. Then click the OK button. |


- Click the Sign-off button
Result: The Sign-off window is displayed. - Enter your user ID and password and then click the Sign-off button
Result: The Result window is displayed. The Result window is a window that displays after definition and asks the user where they would like to go next, such as to the Criteria Detail, to the next step in the workflow if the same user is assigned, or back to the Portal Page.
See Also